









Desk-Mounted Monitor Arms: Clamp Thickness, Grommet Holes, and How to Avoid Desk Damage
A desk-mounted monitor arm is one of the highest-leverage upgrades you can make to any gaming or work setup. It clears your desk surface, puts your screen at exactly the right height, and opens up the kind of clean, cable-managed aesthetic that used to exist only in studio builds. But the arm itself is only half the equation. The mount — the physical connection between your arm and your desk — is where most installations go right or catastrophically wrong.
Get the mount wrong and you are looking at a wobbly screen, a stripped edge, or a permanent crescent-shaped indent in your desktop. Get it right and you will forget it exists. This guide covers the two standard mounting systems for desk monitor arms — clamp and grommet — with a specific focus on the details that actually matter: clamp jaw ranges, grommet hole sizing, desk thickness compatibility, and how to protect your desktop from damage regardless of which method you choose.
How Clamp Mounts Work
A clamp mount, commonly called a C-clamp, is one of the most common mounting systems used with a desk-mounted monitor arm. It grips the rear edge of your desk between two jaws and tightens via a central screw. The upper jaw sits on the desk surface, the lower jaw presses against the underside, and turning the thumbscrew draws them together until the mount is locked in place. No drilling required, no permanent modification, and no tools beyond what comes in the box.
The appeal is obvious. Clamp mounts install in minutes, can be repositioned whenever your setup changes, and leave no trace when removed — which matters if you are renting, or if you simply want the flexibility to reconfigure. For the vast majority of desks and use cases, a properly sized clamp delivers excellent stability. The key phrase there is properly sized, because the variable that breaks most clamp installations is not the arm itself — it is the relationship between the clamp's jaw range and the actual thickness of the desk.
Most consumer-grade monitor arm clamps are rated for desktops between 10 mm and 90 mm thick, though many standard arms target a narrower window of around 10–60 mm. That range sounds wide, but edge conditions tighten it considerably. If you use a desk mat that runs to the rear edge, measure with it in place — a 25 mm desktop with a 3 mm mat is a 28 mm clamping target, and landing close to either published limit means the clamp may barely engage or fail to close fully. Aim for a desk thickness that sits comfortably inside the arm's rated range, clear of either limit, and you will never think about it again.
Equally important is the edge itself. A clamp needs a flat, unobstructed strip of desk edge — typically at least two to three inches of clear, square lip. Desks pushed flush against a wall, desks with rear cable channels running along the back edge, or sit-stand frames with a crossbar directly under the mounting point can all prevent the clamp from seating properly before you even open the box.
How Grommet Mounts Work
A grommet mount is an alternative installation method for a desk-mounted monitor arm. Instead of gripping the desk edge, it passes a threaded post through a compatible hole in the desktop and secures it with a plate and nut underneath. The result is a mount that is anchored to the body of the desk rather than its edge — which typically means greater stability, a cleaner visual profile, and freedom to position the arm anywhere on the surface rather than being constrained to the perimeter.
The hole itself can come from two sources. Many desks ship with pre-drilled cable management cutouts, often 50–80 mm in diameter, which double perfectly as grommet mounting points for most arms. If your desk does not have one, you can drill your own — but check the arm's specifications for the required hole diameter before you commit to cutting. Grommet hole requirements vary meaningfully across manufacturers and models, ranging from as small as 8–10 mm on some compact arms up to 50 mm or more on larger assemblies. Drilling the wrong size means using an adapter or starting over.
The stability advantage of the grommet mount comes from its backing-plate system. A metal plate sits above the desktop and another below it, with the post running through both. When tightened, this sandwich distributes the clamping load across a wide surface area rather than concentrating it on a narrow edge. For heavy ultrawide monitors, dual-arm configurations, or any desk material that is vulnerable to concentrated pressure, this load distribution is not just a preference — it is a meaningful safety upgrade. The main trade-off is permanence: drilling a hole is a commitment, and for renters or frequent movers, that changes the calculus.
Desk Thickness: The Number That Decides Everything
If there is one specification to check before purchasing a desk-mounted monitor arm, it is your desktop's thickness at the exact point where you plan to mount it — not at the center, not at a convenient edge, but at the rear mounting location, measured with anything that sits between the jaws included. Clamp arms publish a jaw range, and your desktop must fall comfortably inside it. Too thin and the hollow or weak core crushes under concentrated pressure. Too thick and the jaw simply will not close.
Here is a practical reference for the most common desktop thicknesses:
- Under 15 mm: Generally too thin for a standard clamp. Desktops in this range risk flexing, developing pressure marks, or experiencing instability. Consider a freestanding monitor stand or a reinforced grommet mount.
- 15–25 mm: The minimum viable range for a clamp on a solid or quality-engineered desktop. Use a steel reinforcement plate if the material is MDF or particleboard.
- 25–50 mm: The sweet spot for most consumer and gaming desks. Both clamp and grommet mounts work reliably at this thickness on solid materials.
- 50 mm and above: Many standard clamps will not accommodate this. Check heavy-duty specifications, or default to a grommet mount.
One measurement detail that frequently catches people out: if your desk sits exactly at the edge of the published range, treat it as out of spec rather than a close pass. A clamp needs to engage with margin, not just technically reach. A desk thickness with a few millimeters of margin on both sides is the one you never have to think about.
Will a Monitor Arm Damage Your Desk?
The honest answer: a properly installed monitor arm on a compatible desk should not cause any damage. The problems happen when the wrong mounting method meets the wrong desk material, or when installation shortcuts substitute for proper technique. Understanding how each material behaves under clamping force is the difference between a setup that lasts years and one that leaves a permanent mark in the first week.
Solid Wood, Butcher Block, and Quality Plywood
These are the most forgiving desktop materials for monitor arm mounting. Dense, fibrous solid wood distributes clamping pressure effectively, resists crushing, and can handle both clamp and grommet installations without reinforcement under normal monitor weights. If you have a solid hardwood or butcher block desktop, you have the widest range of options. The main caution is edge access — even a beautiful hardwood desk becomes a clamp problem if the rear edge is beveled, rounded, or obstructed.
MDF and Particleboard
This is the category that causes most of the horror stories, and it covers the vast majority of budget and mid-range desks. Dense, full-thickness MDF of 25 mm or more holds a clamp far better than particleboard, so the risks below bite hardest on thin or low-density boards. MDF and particleboard are composed of compressed wood fibers or particles held together by resin. Under concentrated pressure — exactly the kind a C-clamp exerts on a narrow edge strip — those fibers can crush, slowly deform over time, or cause the laminate surface to crack and separate. The three most common failure modes are edge crushing (the clamp bites into the soft core), surface denting (the upper jaw plate sinks into the desktop), and structural sagging as the material yields to constant leverage.
The myth to dispel here is that tighter equals safer. Overtightening a clamp on MDF or particleboard does not increase security — it increases the likelihood of permanent damage. Stop tightening the moment the mount is snug and no longer wobbles. If you are using a clamp on this material, place a steel reinforcement plate between the clamp jaws and the desk surface on both sides. A reinforcement plate spreads the load across a much wider area, which is the root fix for most particleboard clamp problems. For this material type, a grommet mount with large backing plates on both surfaces is the safer long-term choice.
One more thing to check: if you look at the underside or inside a cable hole and see a cardboard-like honeycomb structure, you are dealing with a hollow-core desk. Do not use a standard clamp mount on a hollow-core desktop without significant reinforcement — the structural voids remove the material that the clamp depends on for grip.
Tempered Glass
Do not use a standard C-clamp directly on a tempered glass desktop, full stop. The concentrated pressure at the clamp contact point creates a stress concentration that can fracture the glass. For glass surfaces, a grommet mount is the only appropriate method — and it must be installed with large rubber or nylon washers and a substantial metal backing plate on both surfaces to distribute the load safely. Always verify that your specific monitor arm is rated for use with glass workstations before proceeding.
Clamp vs. Grommet: Head-to-Head Comparison
With the technical context established, here is how the two systems compare across the factors that matter most for a gaming or productivity setup:
| Factor | Clamp Mount | Grommet Mount |
|---|---|---|
| Installation | Non-permanent, attaches in minutes with no tools | Requires a hole; more involved but straightforward |
| Stability | Good to excellent on compatible desks | Excellent; distributes force through the desktop body |
| Desk Damage Risk | Low on solid materials; higher on MDF/particleboard if overtightened | Very low; load spread across backing plates |
| Material Compatibility | Best on solid wood, plywood, quality laminate 15–50 mm thick | Works on almost any material including glass and particleboard (with plates) |
| Aesthetics | Hardware visible at desk edge | Clean, minimal — hardware sits below the surface |
| Placement | Constrained to the desk edge | Anywhere a hole can be drilled or already exists |
| Best For | Renters, frequent rearrangers, standard solid desktops | Heavy monitors, ultrawide setups, glass, particleboard, permanent builds |
Height-Adjustable Desks: Extra Considerations
Pairing a desk-mounted monitor arm with a height-adjustable standing desk introduces two installation factors that static desk users never have to think about. The first is cable management. As the desk transitions through its height range, cables attached to the monitor will shift with it — and any cable that is run too tightly will pull, kink, or eventually disconnect at the monitor or at the PC. The fix is straightforward but easy to forget: build a deliberate service loop of extra cable length (typically 25–35 cm) and secure it loosely under the desktop. Then test the arm through the full height range — from the lowest to the highest position — before finalizing your routing. Finding a cable problem after the fact means rerouting everything.
The second consideration is vibration and micro-movement. Every time the desk motor runs, the frame transmits a small amount of vibration to the mounting point. On a solidly constructed standing desk with a thick, rigid worksurface, this is a non-issue. On a thinner or lower-density desktop, repeated movement cycles can gradually loosen a clamp or, over time, expand a grommet hole in soft material. If your standing desk has a worksurface on the thinner side of the compatible range, check your clamp tension every few months and consider a grommet mount for a more permanent solution.
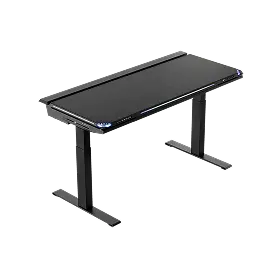
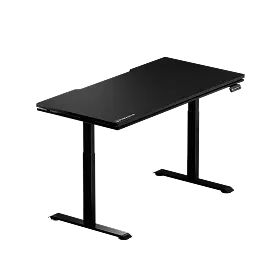
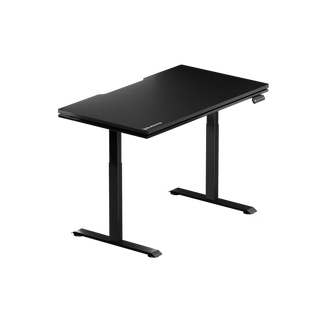
If you are building a full ergonomic workstation from the ground up, the Blacklyte Atlas Desk and the Atlas Lite Standing Desk are designed with integrated cable management and a built-in electrical socket — which meaningfully reduces the cable-loop challenge when adding monitor arms. Both have clamp-ready tops — 1.02″ (26 mm) on the Atlas Desk and 0.98″ (25 mm) on the Atlas Lite — and neither lists a pre-drilled grommet hole, so plan on a clamp mount. A desk built with cable routing in mind from the start is simply easier to keep clean and correctly tensioned. You can compare both models side by side on the Blacklyte desk comparison page.
Pre-Installation Checklist
Before purchasing or installing any monitor arm, run through these four checks. They are quick, and each one has the potential to save you from returning hardware or repairing a desk.
- Measure desktop thickness at the mounting point — not at a random edge, but exactly where the clamp or grommet will sit. Include your desk mat if it extends to that area. Confirm the number falls comfortably within the arm's published jaw range.
- Assess your edge and rear access — check that the rear edge is flat, square, and unobstructed by cable channels, wall clearance, or frame crossbars. If there is less than two inches of clear lip, a grommet mount is the more reliable path.
- Verify your monitor's VESA pattern and weight — most monitors use a 75×75 mm or 100×100 mm VESA pattern. Weigh your monitor (or check the spec sheet) and choose an arm rated for at least 10–20% more than that figure to provide a stability buffer, particularly for ultrawide or curved panels.
- Check desk material before deciding on mount type — if you are dealing with particleboard, thin MDF, or hollow-core construction, plan for reinforcement plates or default to a grommet mount. If the desktop is glass, a grommet mount is the only appropriate choice.
Taking ten minutes to answer these questions before opening any packaging will prevent the most common installation problems — and keep your desk looking the way it did on day one. For a broader look at building an ergonomically sound workstation, the Blacklyte Ergonomics guide covers monitor height, posture alignment, and peripheral placement in detail.
The Right Mount for the Right Desk
There is no universally superior mounting method — only the right method for your specific desk, material, and use case. Clamp mounts are fast, non-destructive, and completely sufficient for solid desktops with compatible edge dimensions. Grommet mounts offer superior stability, a cleaner aesthetic, and the versatility to handle materials and desk geometries that clamps simply cannot. The desk damage risk with either method is low when installation is done correctly — the problems almost always trace back to mismatched thickness, wrong material handling, or overtightening on a soft core.
Know your desktop's thickness and material before you commit to either option. Use reinforcement plates on particleboard and thin engineered wood. Build proper cable loops on height-adjustable setups. And if your monitor load is on the heavier side — ultrawide panels, dual configurations — choose a grommet mount where your desk allows one, or make sure the clamp sits on a thick, solid desktop. A monitor arm is a long-term investment in your comfort and workflow; the fifteen minutes spent choosing and installing the right mount is what makes that investment pay off.
Explore the full range of single monitor arms, dual monitor arms, and standing desks built to support performance setups from the ground up.
Ready to Build Your Ideal Setup?
Whether you have questions about desk compatibility, monitor arm accessories, or finding the right ergonomic foundation for your station, the Blacklyte team is here to help.
Contact Us


